The simple solution for your API integration – directly in your development environment via VSIX file.
The DHL API Assistant (hereinafter: MCP Server) simplifies the integration of DHL Post & Parcel Germany APIs for you.
This is a guide for the technical integration of the MCP Server into your development environment Microsoft Visual Studio Code.
General information about the DHL API Assistant can be found in the DHL API Assistant – Manual MCP Integration Guide.
What is an MCP Server?
The MCP Server (Model Context Protocol) is an "adapter layer" between your development environment and the DHL APIs. It connects GitHub Copilot in Visual Studio Code with the DHL APIs and provides the information required for your integration directly in the working context. This means for you:
- less integration effort,
- direct access to API functions in the IDE,
- faster implementation of shipping, returns, and tracking processes.
In short: You work on your application, the MCP Server handles the API complexity.
In
Agentmode, GitHub Copilot can communicate directly with the MCP Server. This allows technical queries, initial tests, and subsequent integration steps to be carried out within the same development environment. Combined withAgentmode, the MCP Server can prepare and implement the technical integration largely autonomously.
Further information on API Key, API Secret, app creation, test environment, and production can be found in the FAQ and additional information section at the end of this guide.
Prerequisites
To use this, you need:
- a current version of Visual Studio Code IDE
- DHL API Assistant as an extension in Visual Studio Code: VSIX file
- a GitHub Copilot subscription
A GitHub Copilot subscription is strongly recommended for meaningful use of the MCP Server. Without a subscription, the MCP Server is only very limited in its usability, as its full potential only comes into play in Agent mode. The free requests without a subscription are generally not sufficient for this use case.
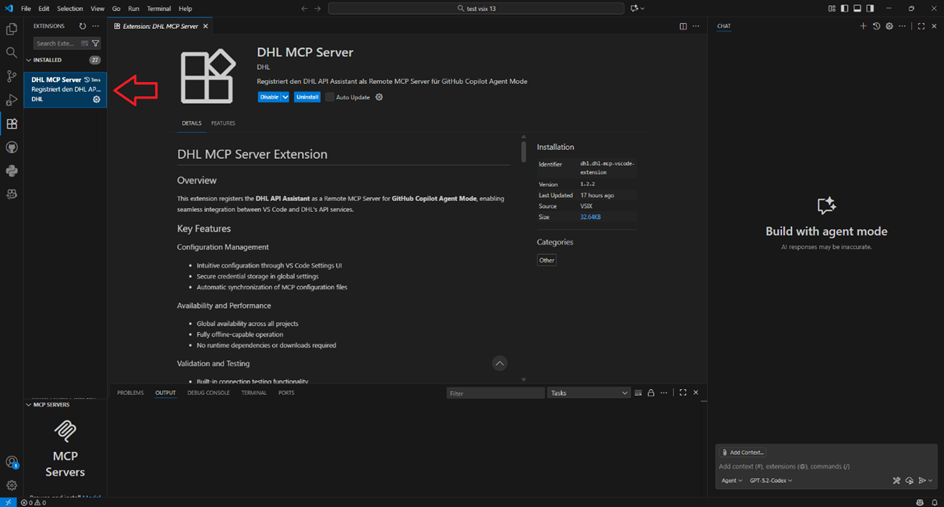
Important note: After successful installation, the MCP Server does not appear under MCP Servers installed in Visual Studio Code, but in the regular list of installed extensions (Extensions installed).
Setting Up the DHL API Assistant
Step 1: Install the DHL API Assistant Extension
To install the extension (VSIX file):
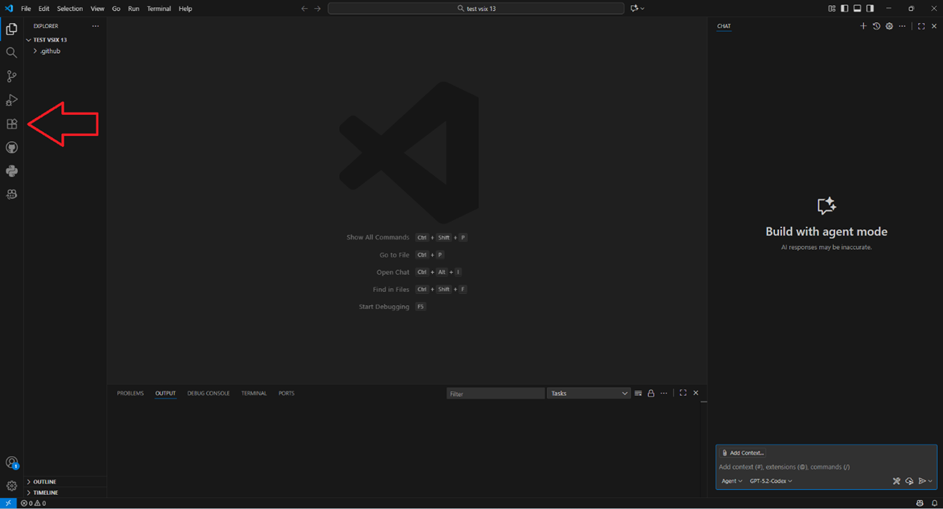
-
Click on the Extensions icon on the left side of Visual Studio Code.
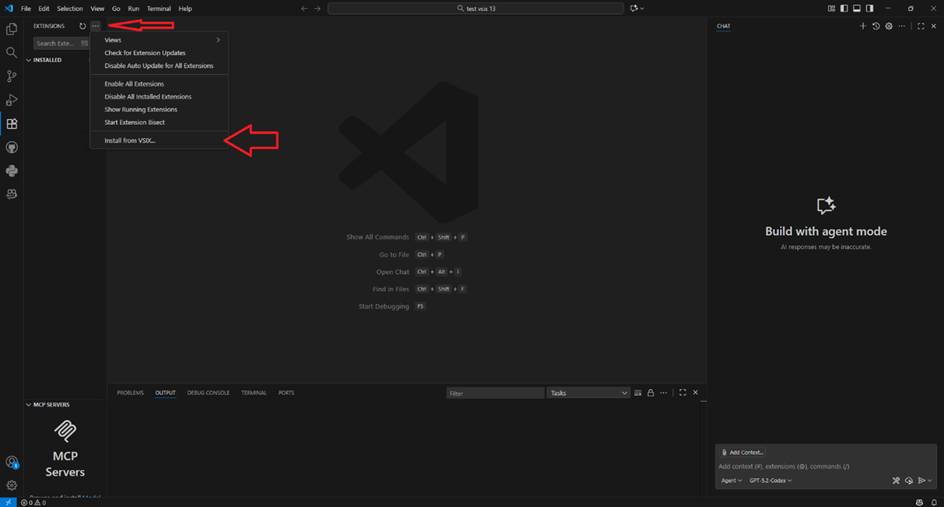
-
Click on the three dots (...) in the top right of the Extensions area and select Install from VSIX.
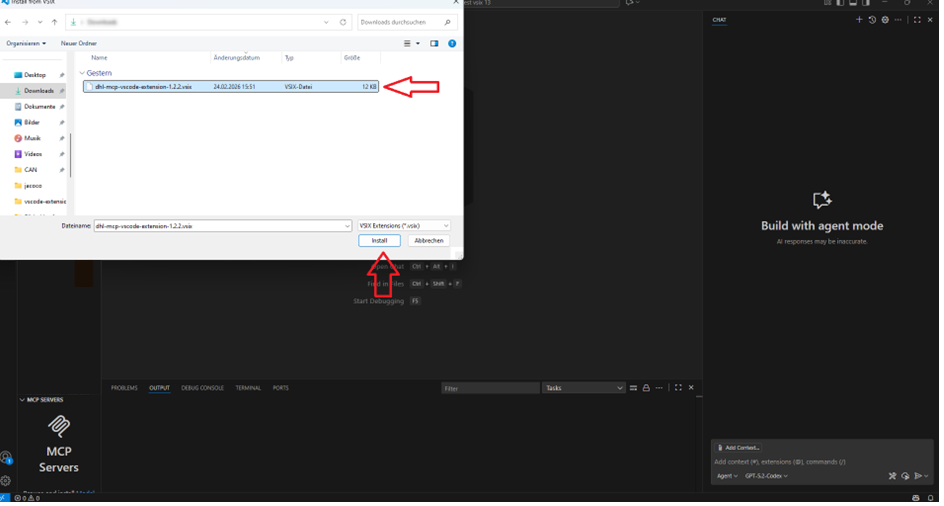
-
Select the provided VSIX file and then click Install.
- After installation, the MCP Server should be visible in the regular Extensions list (Extensions installed).
Step 2: Configure the Server
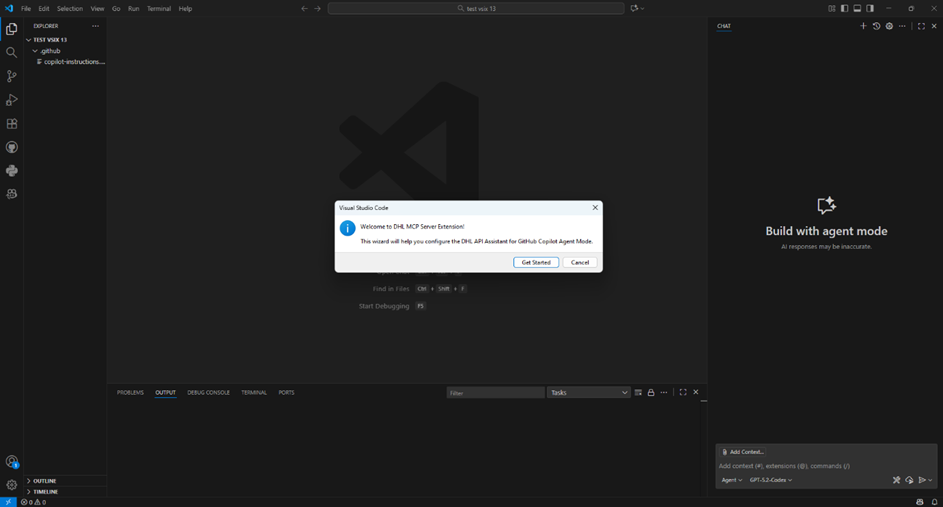
- Open a project in Visual Studio Code and wait for the setup window to appear. This may take up to one minute. Then click Get Started.
Why? The assistant guides you through the setup and ensures that the MCP Server is correctly registered.
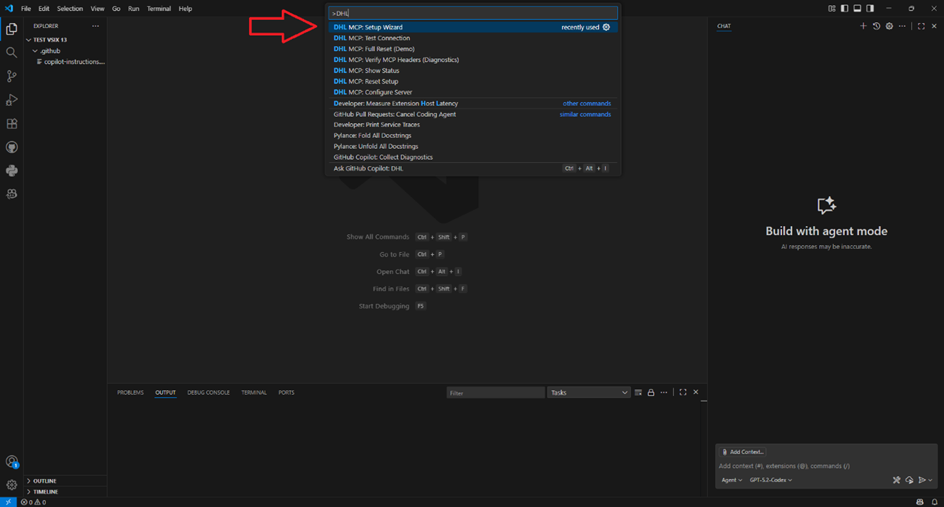
- If the window does not appear automatically, press Ctrl+Shift+P, search for DHL MCP: Setup Wizard and start the command manually.
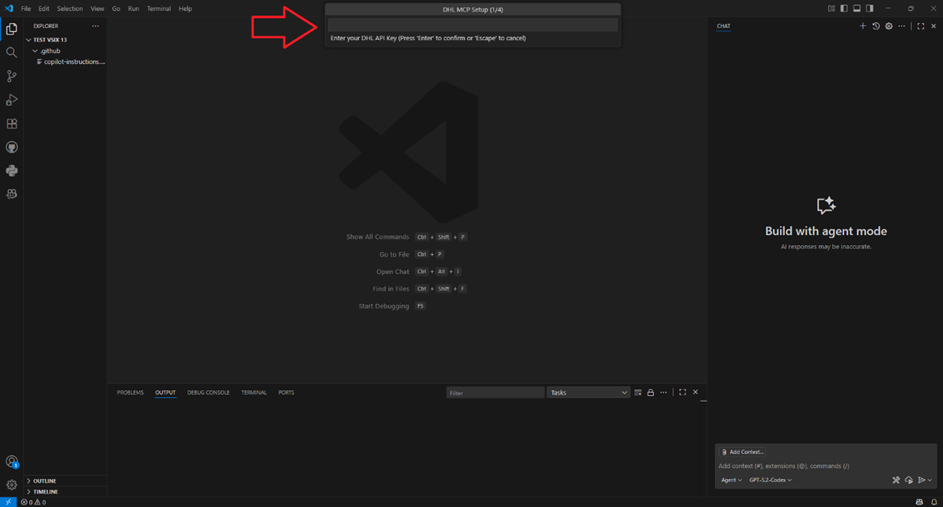
- Enter API Key
A field labeled Enter your DHL API Key will appear. Enter your DHL API Key here and confirm the input. For more information, see FAQ point 1.
Why? The API Key is a central access value for the connection to DHL services.
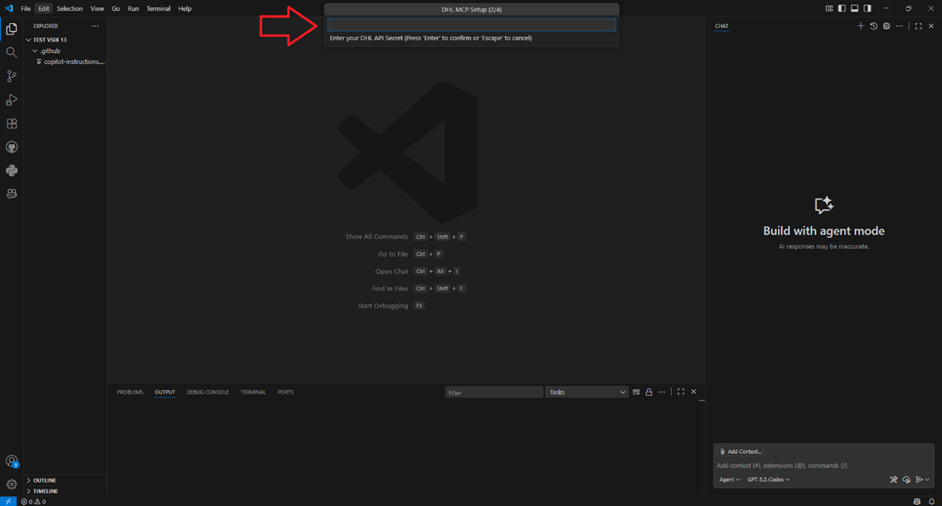
- Enter API Secret
Then Enter your DHL API Secret appears. Enter the corresponding secret here. For more information, see FAQ point 1.
Why? The API Secret belongs to the API Key and is required for authentication.
- Confirm or adjust username
The username field is already pre-filled with user-valid. This value is the default for the test environment.
If you are working in the test environment, you generally do not need to change this value. Only when switching to production should you enter your real username here. For more information, see FAQ point 2.

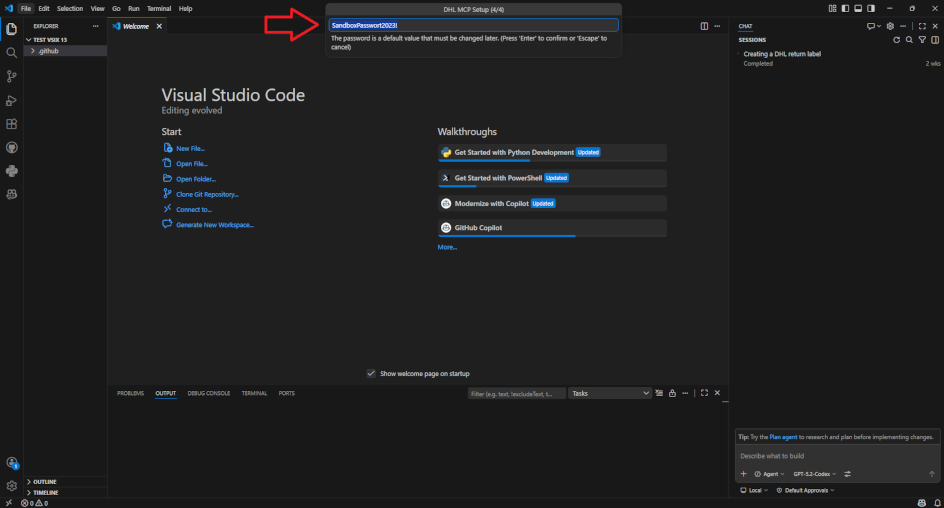
- Confirm or adjust password
The password field is already pre-filled with SandboxPasswort2023!. This value is also the default for the test environment.
If you are working in the test environment, you generally do not need to change this value. Only when switching to production should you enter your real password here. For more information, see FAQ point 2.
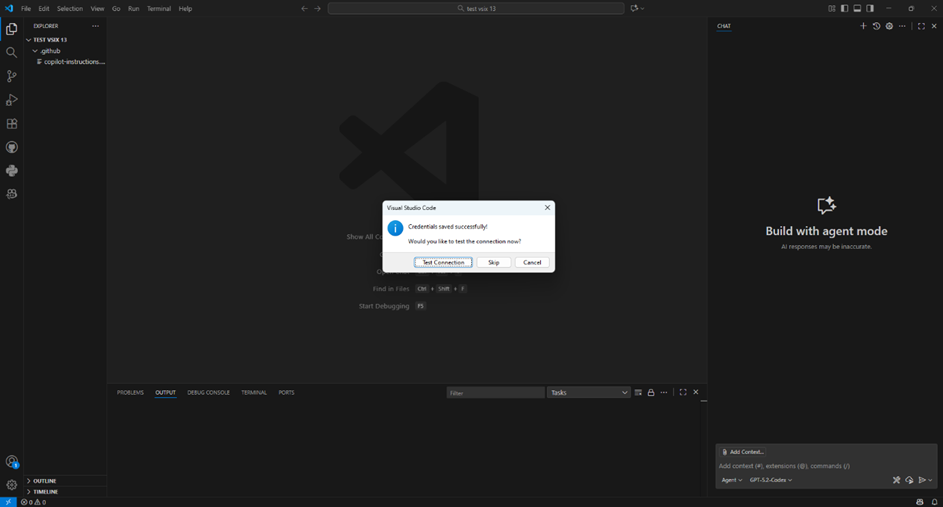
- Save and test connection
After saving, the assistant asks whether you want to test the connection. Select Test Connection. An explanation can be found in FAQ point 3.
Why? This test exclusively checks whether your development environment in Visual Studio Code can reach the MCP Server. This is the prerequisite for subsequently working with the MCP Server.
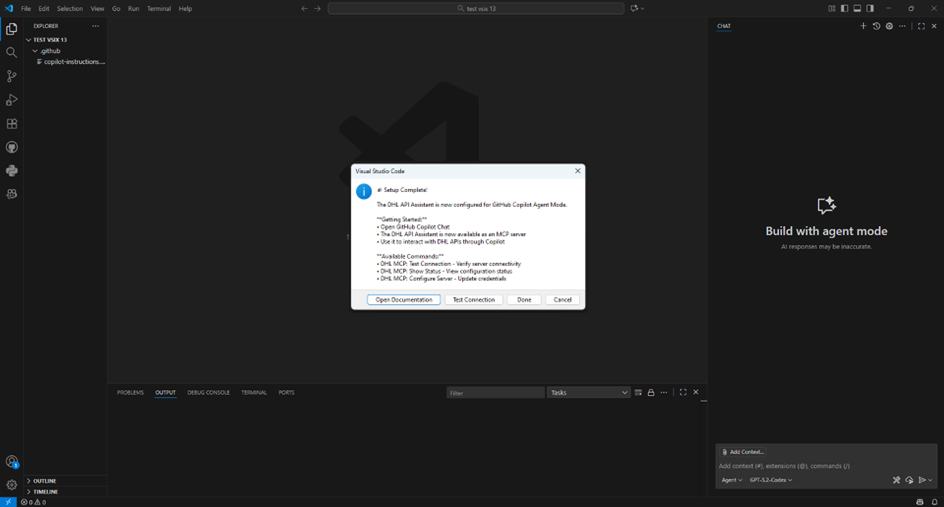
Step 3: Check the Completion Screen
When the message Setup Complete appears, the setup is finished. The MCP Server has then been registered in Visual Studio Code.
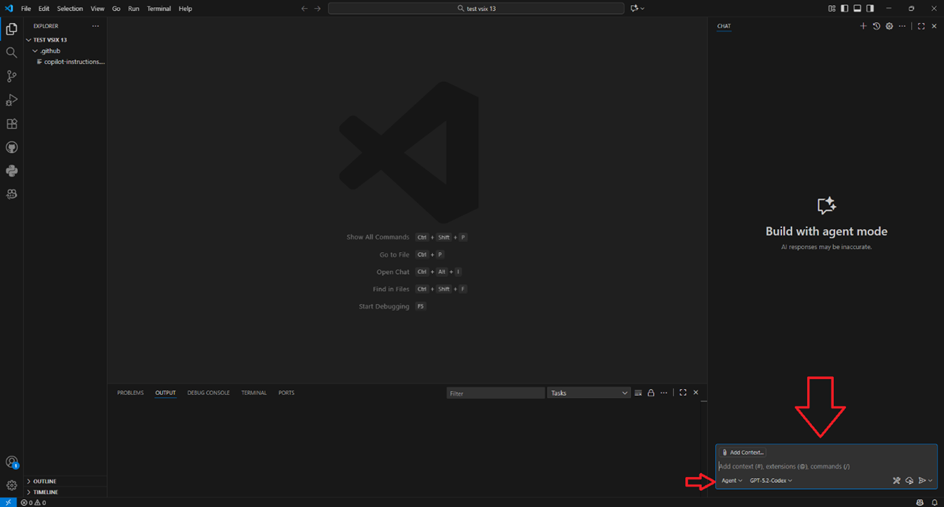
Step 4: Send Your First Request to the MCP Server
After setup, you can open GitHub Copilot Chat in Visual Studio Code and communicate with the MCP Server using natural language. For example:
Please check the status for DHL shipment number 003404341234567890This example is a fictional first test call. It is only intended to address the MCP Server for the first time via chat.
GitHub Copilot sends the request in the background via the MCP Server to the test environment of the respective API and writes the response directly into the chat.
Important: Make sure that Copilot is set to Agent mode.
FAQ and Additional Information
Where do I get the API Key and API Secret?
You can obtain this data from the DHL Developer Portal:
- Create an account at developer.dhl.com.
- Go to
My Appsand create a new app there. - Select the API you want to use or test.
- After creating the app, you will receive an API Key, sometimes also called Consumer Key or Client ID, as well as an API Secret (Client Secret).
- Without these values, the MCP Server cannot establish a connection.
A step-by-step guide to creating an app can be found here: How to create an app
When do you need real credentials?
Initially, the MCP Server sets up the connection for the test environment. In this case, you enter your API Key and API Secret. The username and password for the test environment are already stored as default values.
When you later switch to production, you must change the environment in the settings to Production and enter your real credentials. These include:
API Key
API Secret
Username
Password
Additionally, please note that access to production for some APIs is only unlocked after a mandatory onboarding process.
What exactly is Test Connection for?
Test Connection checks whether Visual Studio Code can reach the MCP Server. The test therefore confirms the technical reachability within your development environment. It is not a functional check of a specific shipping or tracking process.
How do I see if the server is active?
Open the VS Code command palette with Ctrl + Shift + P or on macOS with Cmd + Shift + P.

Enter DHL MCP: Show Status and confirm with Enter.

A message appears in the bottom right. It should read:
Credentials set: Yes
MCP Server Active: Yes
What should I do if the test fails?
Quick checklist:
Check whether the API Key and API Secret were entered correctly.
Check whether an internet connection exists.
Check whether a proxy or firewall is blocking the connection.
If everything looks correct, restart Visual Studio Code.
Additional helpful commands
Ctrl + Shift + P
Change data later: DHL MCP: Configure Server
Reset setup: DHL MCP: Reset Setup or DHL MCP: Full Reset